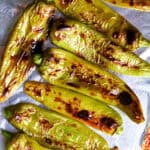
How To Roast Hatch Chiles
Servings: 24 servings
Calories: 5kcal
Ingredients
- 12 Hatch chiles rinsed and patted dry - wear gloves
- Avocado oil spray
Instructions
- Place an oven rack at the uppermost spot in your oven. Preheat the broiler.
- Lightly spray avocado oil on a baking sheet lined with aluminum foil. Place the chiles on the foil in a row; lightly spray them and place them under the broiler.
- Check the chiles every couple of minutes. After 2 to 3 minutes, pull out the baking sheet and flip the chile peppers over with tongs to get an even char, then put them back under the broiler. Broiling will take approximately 5 to 8 minutes from beginning to end; check the chiles every minute as they get closer to being done.
- Once the Hatch chiles are charred on both sides, use the tongs to place them in a resealable, freezer-safe, sturdy ziploc bag (or use foil or a bowl with a lid) until they're cool enough to handle, for at least 30 minutes. The longer, the better, as the steam inside the bag loosens the outer skin.
- Wearing gloves, remove the charred skin on the Hatch chiles. With your hands, split the softened chiles, scrape the seeds from the inside, and discard the stem.
- Let the Hatch chiles cool on the counter before placing them in an airtight container for refrigeration. See notes for freezing instructions.
Notes
- Do not touch your face or eyes while preparing or handling chiles, as the heat from the chiles can cause burning. Remove contact lenses before starting.
- Once the chiles have cooled, refrigerate in an airtight container for up to 3 to 5 days, or freeze the chiles in a single layer in resealable freezer-safe plastic bags, squeezing the air out, for up to one year. You can chop the chilies if you prefer and place them in quart size freezer bags for smaller portions.
- Once the peppers are peeled and chopped, figure approximately 1 ounce per serving. which is approximately 2 tablespoons. This can vary depending on the heat of each individual chile and each person's tolerance for heat!
- Instead of broiling, roast them on a lower oven rack in the oven at 450°F for approximately 20 minutes until they start charring on the outside.
